・目的
osoyooのarduinoキットに入っていた
ディスプレイにhello worldを表示させる
・使ったもの
arduino uno
ノートパソコン(windows10)
ブレッドボード
ジャンパワイヤーオス、メス
キャラクタLCD(16×2)(osoyoo製)
・方法
(1)LCDライブラリーをインポート
http://osoyoo.com/ja/2014/12/07/16x2-i2c-liquidcrystal-displaylcd/
osoyooのサイトからLiquidCrystal_I2C.zipというlibraryファイルを
ダウンロードしてzipファイルを解凍する。
解凍したファイルをc/programfile/arduino/libralesにコピー
SDAはSerial Data Access (シリアルデータアクセス)の略。
SCLはSerial Clock Line (シリアルクロックライン)。
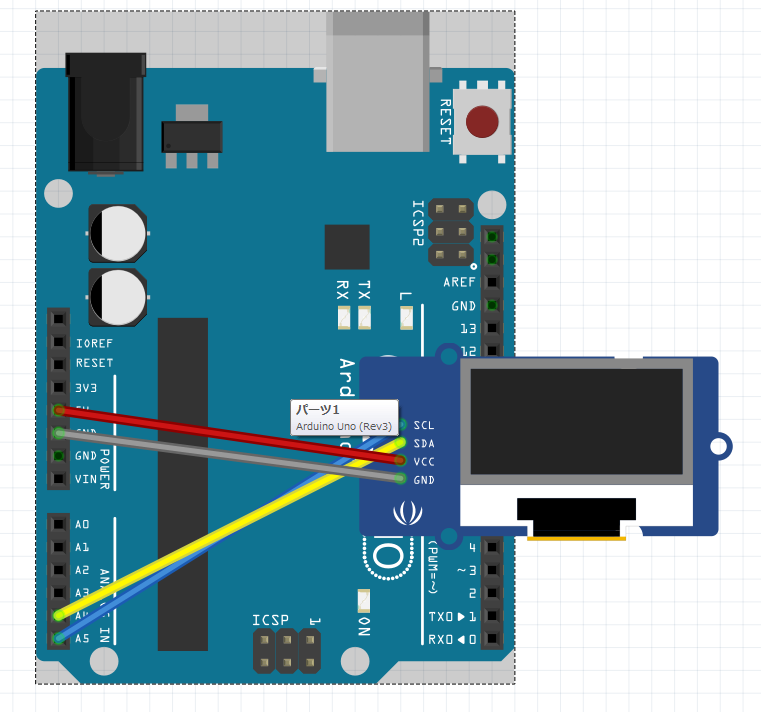
SDLをa5 、SDAをa4に接続した。回路図は図1に示した。

(3)i2cアドレスを特定する
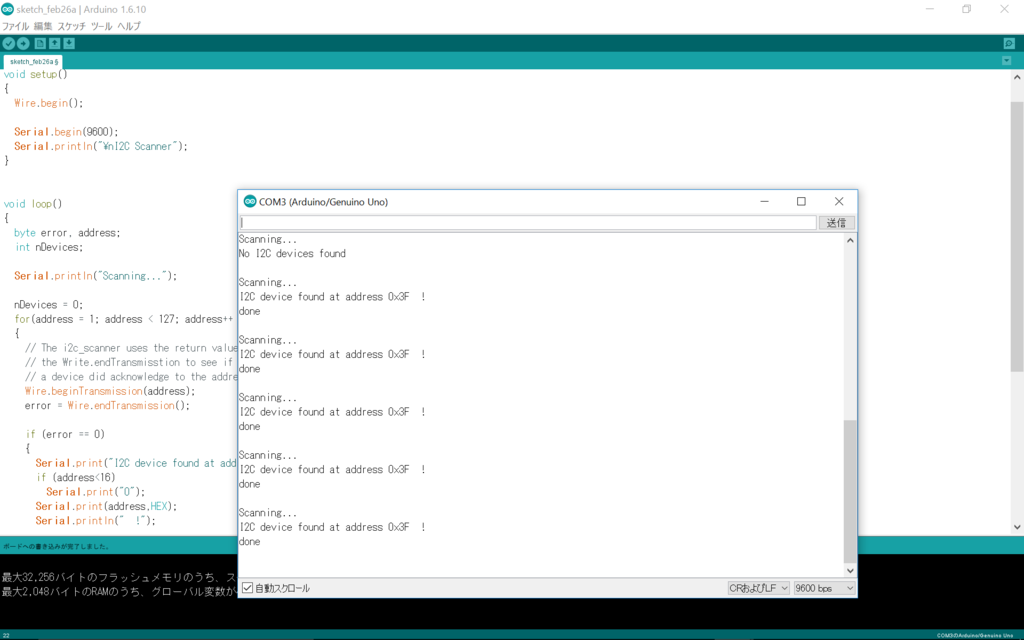
i2cアドレスを特定するために以下のプログラムコード(図2)を
インポートし、シリアル通信画面を開き実行すると
i2cアドレスが表示される(図3)。
 *  ___   ___  ___  _   _  ___   ___   ____ ___  ____
 * / _ \ /___)/ _ \| | | |/ _ \ / _ \ / ___) _ \|    \
 *| |_| |___ | |_| | |_| | |_| | |_| ( (__| |_| | | | |
 * \___/(___/ \___/ \__  |\___/ \___(_)____)___/|_|_|_|
 *                  (____/
 * www.osoyoo.com IC2 Liquid Crysal Testing program
 * program tutorial : http://osoyoo.com/?p=72
 *  Copyright John Yu
 */

#include <Wire.h>
#include <LiquidCrystal_I2C.h>

LiquidCrystal_I2C lcd(0x3f,16,2);  // run ic2_scanner sketch and get the IC2 address, which is 0x3f in my case,it could be 0x3f in many cases

void setup()
{
  lcd.init();                      // initialize the lcd
}

void loop()
{
// set cursor to first line
lcd.setCursor(0, 0);

// Print a message to the LCD.
  lcd.backlight();
  lcd.print("Hello!");
  lcd.setCursor(0,1);
  lcd.print("Osoyoo.com");
}
図2:i2cアドレスを特定するためのスケッチ      http://osoyoo.com/driver/i2c_lcd_test.txt
図3:i2cアドレスの特定
(4)プログラムコード
(3)で調べらiscアドレスを
LiquidCrystal_I2C lcd(0x3F,16,2);と書き込む。
#include  <Wire.h>
#include  <LiquidCrystal_I2C.h>

LiquidCrystal_I2C lcd(0x3F,16,2);  // set the LCD address to 0x27 for a 16          chars and 2 line display

void setup()
{
  lcd.init();               // initialize the lcd

  lcd.print("Hello World");// Print a message to the LCD.
  lcd.backlight();

}
 |
価格:8,240円 |
![]()
・結果
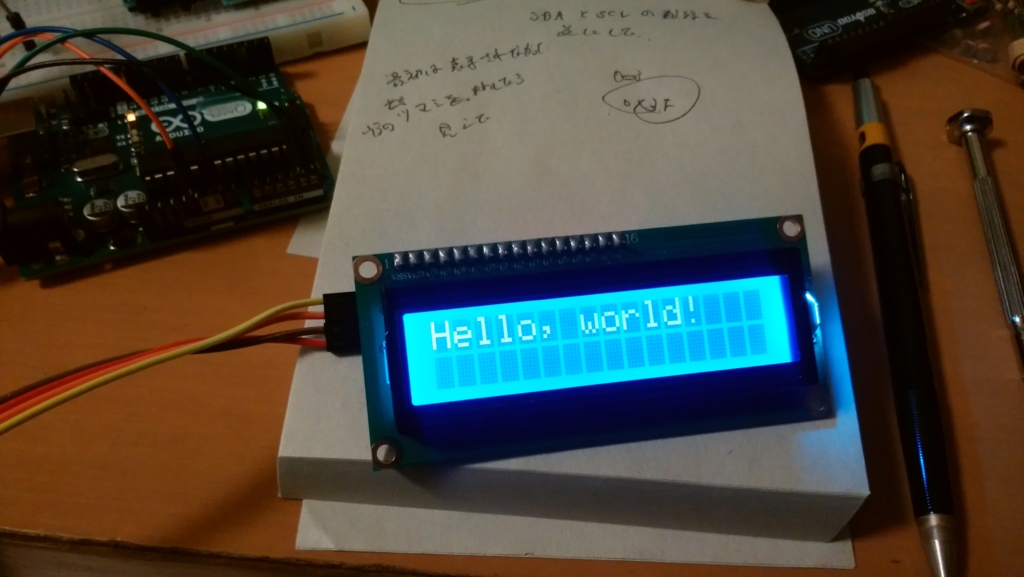
無事表示できた。

<参考文献>
・16x2 I2C LCD プロジェクト(http://osoyoo.com/?p=72)


